
Woodland Photography Scotland |
Atlantic Rainforest Photography Guide
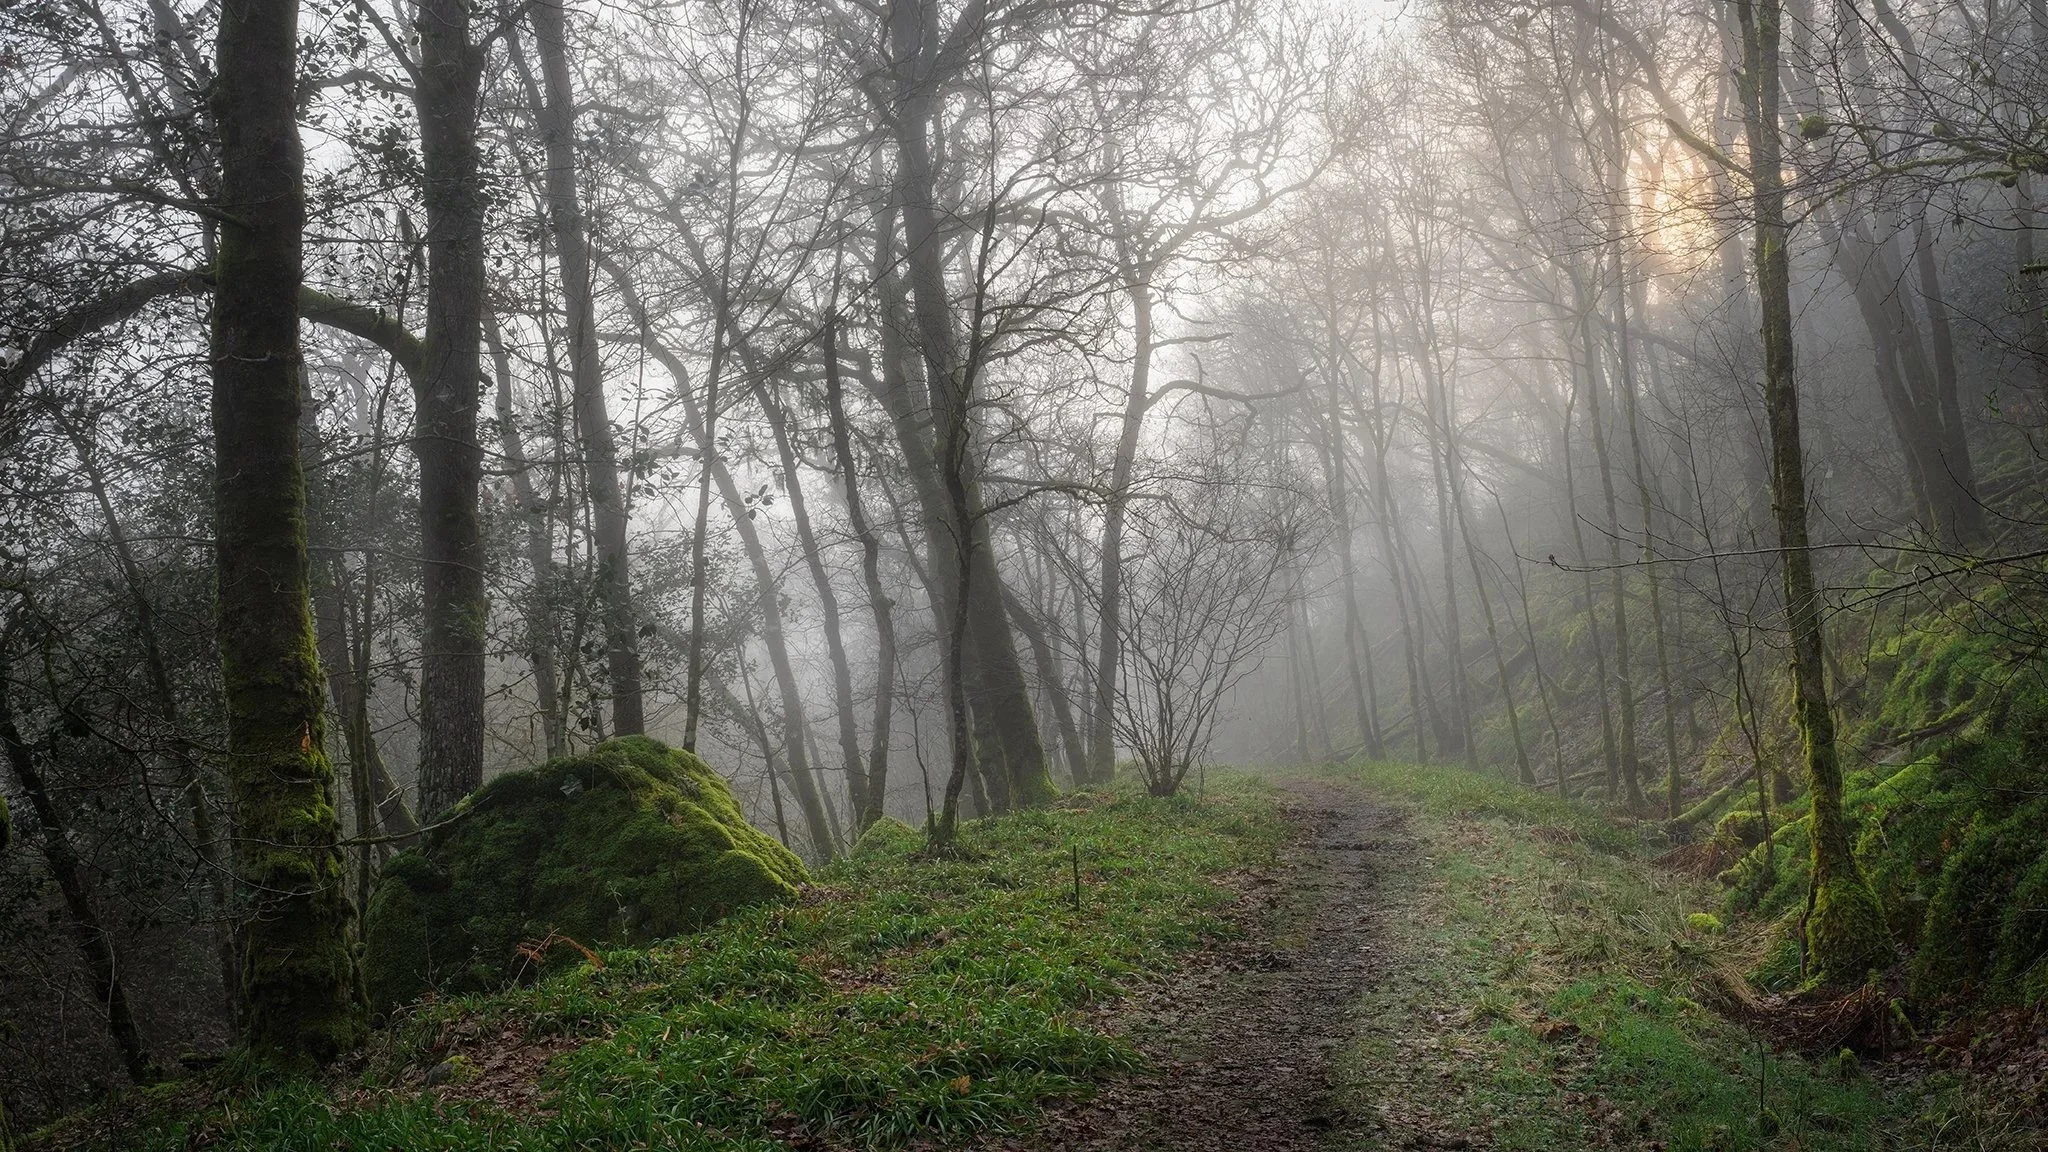
Learn how to photograph Scotland’s Atlantic Rainforest with this field guide to woodland photography. Tips on composition, light, and creating atmospheric, intimate landscape images.
The Place Where Photography Changes Pace
There’s something different about Scotland’s Atlantic Rainforest.
It doesn’t shout.
It doesn’t perform.
It asks you to slow down.
To look closer.
To feel more than you see.
This isn’t about dramatic light or grand vistas.
It’s about intimacy, atmosphere, and quiet observation.
What You Need (And What You Don’t)
You don’t need more gear — you need more intent.
Mid-range lens (35–70mm) → your storyteller
Telephoto (70–200mm) → your simplifier
Wide angle → only when the foreground earns it
Tripod → essential
Polariser → control reflections, deepen greens
The shift is simple:
You’re not collecting scenes — you’re editing reality in-camera.
Simple Settings That Work
Aperture: f/8–f/11
ISO: 100–400
Shutter: let it fall where it needs
If water is present:
1/4–2 sec → softness
Go Faster → texture
Composition: The Quiet Discipline
Most people photograph everything.
The rainforest rewards those who do the opposite.
Get lower than feels natural
Remove distractions at the edges
Let one subject lead
Use depth and mist to simplify
Ask yourself constantly:
➡️ What is this image actually about?
Forget the obvious.
The strongest images are often within a few steps of where you’re standing.
Moss-covered stones
Lichen-draped branches
Twisting oak limbs
Quiet woodland streams
Patterns, textures, repetition
This isn’t traditional landscape photography.
This is observation.
What to Look For
Conditions Over Locations
You can revisit the same woodland endlessly.
It only becomes magical when:
Rain softens everything
Mist separates layers
Wind disappears
It’s not where you go.
It’s when you arrive and what you see.
Field Workflow:
Slow Is Fast
Arrive and pause
Walk without shooting
Notice what pulls you in
Build one composition
Refine it — then refine it again
You don’t need 100 images.
You need one that means something..
Creative Reflection (Where Your Work Changes)
This is the difference.
Not sharpness.
Not gear.
Intent.
Ask yourself:
Why did I press the shutter?
What was I looking for?
What did I find instead?
What emotion sits in this frame?
Is it:
quiet
melancholic
hopeful
restorative
This is what turns a photograph into something people feel.
Explore More Field Notes
If you enjoyed this glimpse into the world of Woodland Photography, you’ll find many more stories from Scotland’s wild places throughout the site.
From Atlantic rainforest landscapes to seasonal wildlife encounters, the Field Notes sections share observations, photographs and how to’s from the forests, rivers and hills of Scotland.
Well, if you got this far - thank you, so here’s a little extra -
A Cheat Sheet if you will!
🔍 WOODLAND PHOTOGRAPHY CHEAT SHEET
Precise • Intentional • On Location
1. FIND THE SUBJECT (ALWAYS FIRST)
Ask yourself:
What is this photo about?
✔ One tree
✔ A relationship (group of trees)
✔ Shape / gesture
✔ Light / atmosphere
➡️ If you can’t say it in one sentence… don’t shoot yet.
🌿 2. CALM THE CHAOS (DON’T FIGHT IT)
You’re not removing the woodland — you’re organising it.
✔ Keep:
Soft background detail
Repetition
Natural layering
❌ Avoid:
Bright distractions
Branches cutting through your subject
Strong edges pulling the eye
➡️ “We’re calming the scene, not cleaning it.”
🌫️ 3. BUILD DEPTH (CREATE IMMERSION)
Look for 3 layers:
Foreground → entry
Midground → subject
Background → separation
✔ Mist = gold
✔ Soft light = gold
➡️ Depth is what turns a photo into a place you can step into.
⚫ 4. USE TONE FIRST (NOT COLOUR)
Your eye follows light before colour.
✔ Subject = slightly brighter / clearer
✔ Background = softer / lower contrast
➡️ Mentally switch to black & white first.
🎨 5. KEEP COLOUR SIMPLE
✔ One dominant colour (usually green)
✔ Supporting neutrals (browns, greys)
✔ Controlled saturation
❌ Avoid:
Neon greens
Over-processing
➡️ “Colour supports the image — it doesn’t lead it.”
⚖️ 6. SIMPLIFY… BUT DON’T KILL IT
Ask:
Can I simplify this?
If I do… does it lose its feeling?
➡️ Stop just before it becomes boring.
⚠️ 7. CHECK THE EDGES (CRITICAL)
Before every shot:
❌ Bright corners
❌ Cut branches
❌ Half shapes
❌ Remember the Border Police!
➡️ Edges ruin more woodland photos than anything else.
📷 8. LENS CHOICE (HOW YOU CONTROL CHAOS)
Wide (14–35mm) → Only if foreground is strong
Mid-range (35–70mm) → Your default storyteller
Telephoto (70–200mm+) → Simplify & compress layers
Macro / close focus → Where your unique work lives
➡️ If it feels messy… go longer.
⚙️ 9. SIMPLE SETTINGS (BASELINE)
Aperture
f/8–f/11 → general scenes
f/4–f/5.6 → isolate subjects
Shutter
Static → as needed (tripod)
Water →
1/4–2 sec = flow
Faster = texture
ISO
100–400 (raise if needed)
Focus
Single point for precision
Focus stack when depth matters
🌧️ 10. CONDITIONS > LOCATION
Best woodland conditions:
✔ Light rain / drizzle
✔ Mist / low cloud
✔ Still air
❌ Bright sun (kills mood & control)
➡️ The same woodland can be average or magical — depending on conditions.
🌱 11. WHAT TO LOOK FOR
Details
Moss, lichens, bark, ferns
Scenes
Twisting trees
Fallen woodland
Natural tunnels
Atmosphere
Mist layers
Soft backlight
➡️ The best images are often within a few steps of your feet.
🔥 FINAL CHECK (THE PRO QUESTION)
Does it feel calm or chaotic?
✔ Calm → take the shot
❌ Chaotic → adjust position
⚡ LAST - The 10-SECOND FIELD CHECK
What’s my subject?
Any distractions?
Do I have depth?
Where is the light?
Are the edges clean?